Workspaces
Workspaces are an isolated billable unit of infrastructure. When you create a workspace you get an isolated set of endpoints, operations and data persistence. You can create multiple workspaces where data stored in one workspace will not be avaialble in another one.
In the fast-paced landscape of contemporary Health IT software development, efficiency, security, and ease of integration are paramount. Enter the MeldRx Workspace, a platform that redefines the development experience by seamlessly integrating a Data Vault, our Identity Management system, a complete FHIR API and so much more, within a singular, developer-centric environment.
Our Linked Workspace is a never-before-seen innovation that allows your apps to connect effortlessly with any EHR or FHIR server, allowing your apps to work in a truly cross-platform way.
Linked Workspace
Innovation often stems from breaking barriers and defying conventional norms. With that in mind, we proudly introduce a revolutionary new concept - the Linked Workspace. This unparalleled innovation allows apps to connect and integrate with any EHR of any type.
Traditionally, development projects required rigid adherence to predefined systems and isolated environments, stifling the potential for true innovation. The Linked Workspace revolutionizes this status quo by granting developers the unprecedented freedom to connect their workspaces to any environment, facilitating data exchange and functionality integration in ways previously unattainable.
The Linked Workspace doesn't just give access to external EHRs - it enhances them by providing app developers with the tools needed to fill in gaps and deficiencies in the EHR. For example, if an EHR does not allow writing data back, apps can simply write that data to the Workspace and seamlessly meld it back when needed.
The power to bridge external EHR integration and a fully FHIR-compliant internal workspace unlocks a realm of possibilities, from crafting novel applications that blend services in groundbreaking ways, to facilitating rapid experimentation and dynamic adaptations.
Creating a Workspace
- From the home page login to the Command Center
- Navigate to your
Workspacespage. - Click on
Create Workspace
Workspace Type
There are 2 main flavours of workspaces:
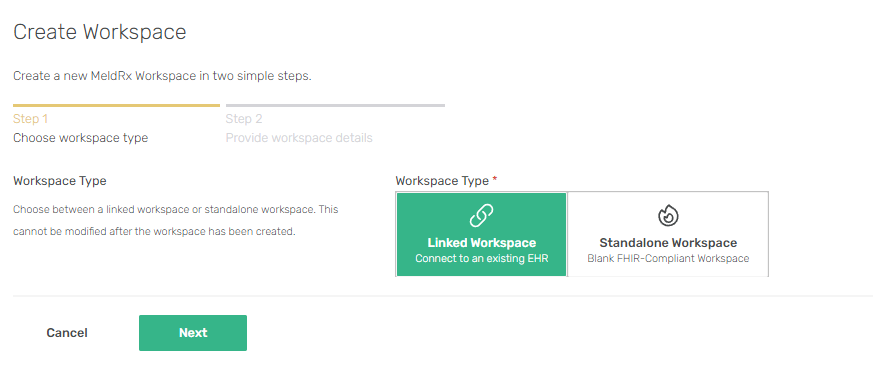
- 🔥Standalone
- 🔗Linked
Standalone - a regular workspace.

- Select
Standalone Workspaceon Step 1. - Fill out the
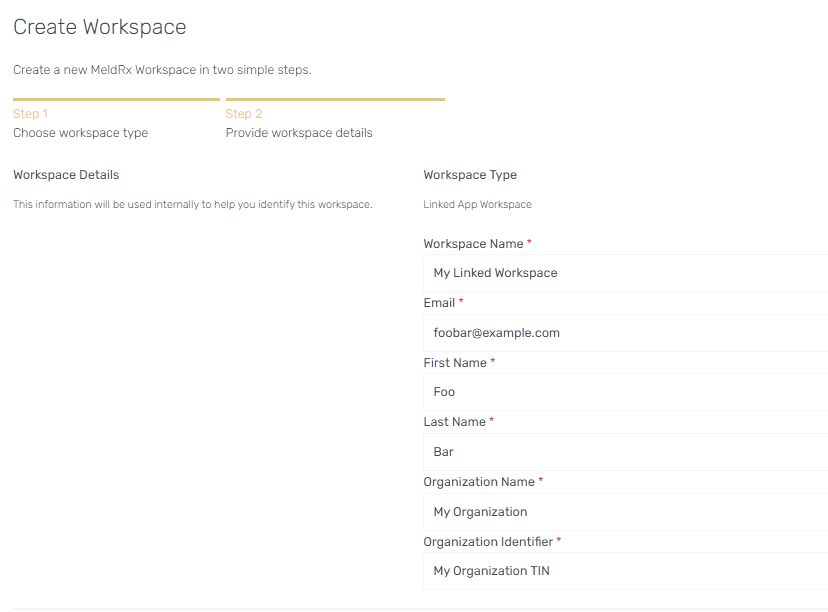
Workspace Namefield. This will be the display name for your workspace. - Create an initial
Userfor the workspace. This user will have theAdministratorRole and will receive an invite. - Fill out the Organization Name/Tin for the Organization that will be tied to the workspace .
- Click
Create Workspace
You are now ready to go!
Linked - a linked workspace is connected to one external FHIR environment. A linked workspace can be configured to read patient data from the external (linked) FHIR environment, but written to the MeldRx environment. This is useful for situations where an external FHIR environment has restrictions, for example, when integrating with an EHR that doesn't allow apps to write data.
- Select
Linked Workspaceon Step 1. - Fill out the
Workspace Namefield. This will be the display name for your workspace. - Create an initial
Userfor the workspace. This user will have theAdministratorRole and will receive an invite. - Fill out the Organization Name/Tin for the Organization that will be tied to the workspace .
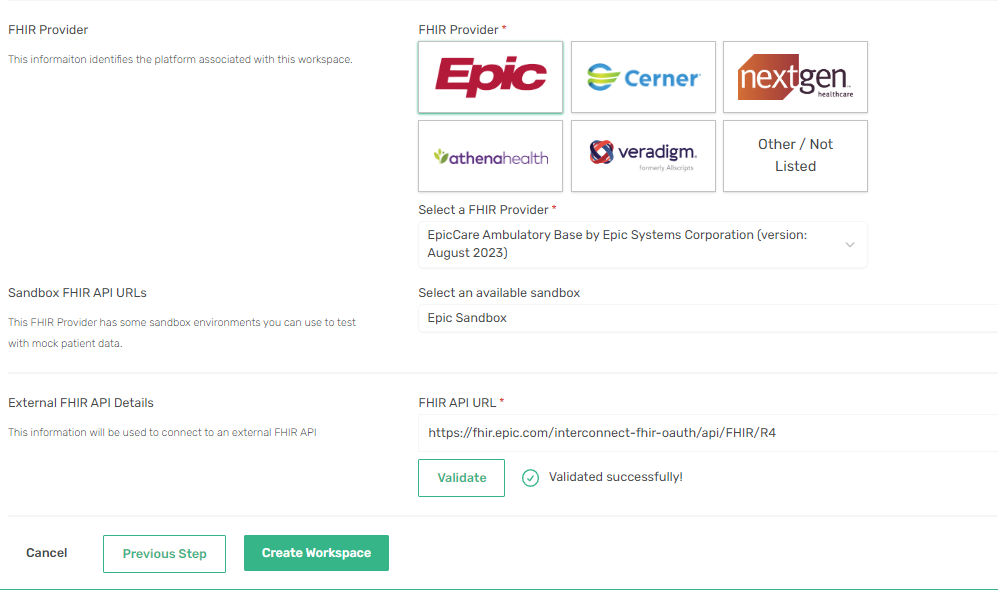
- Find the external FHIR server that you want to connect to in the
FHIR API Providerfield. You can quick select the popular EHRs. (Providers that are listed on the Certified Health IT Product List (CHPL) that have been certified by the ONC Health IT Certification program.) - Specify the
FHIR URLfor the selected external server. The quick select FHIR Providers have a sandbox FHIR URL that you can select. You can find more details for EHR sandboxes here or in the FHIR Providers Tools page. - Click the validate button to make sure the URL is valid.
- Click
Create Workspace
The FHIR URL should have a metadata or .well-known/smart-configuration endpoints like:
<FHIR URL>/metadata or <FHIR URL>/.well-known/smart-configuration, that is how we obtain relevant information about the external FHIR environment.
Managing Your Workspaces
You can manage your Workspace by clicking the Manage button on the workspaces page. Here you can:
- Change the Name of your Workspace
- Manage Users who have access to that Workspace
- Manage Apps that have access to that Workspace
- Manage Data Rules for that Workspace (Linked Workspaces only)
You can delete your workspace at any time. Simply navigate to the app manage page of the app you wish to delete and click on the delete button. A confirmation window will be displayed. Once confirmed, the workspace will be deleted and can no longer be used.
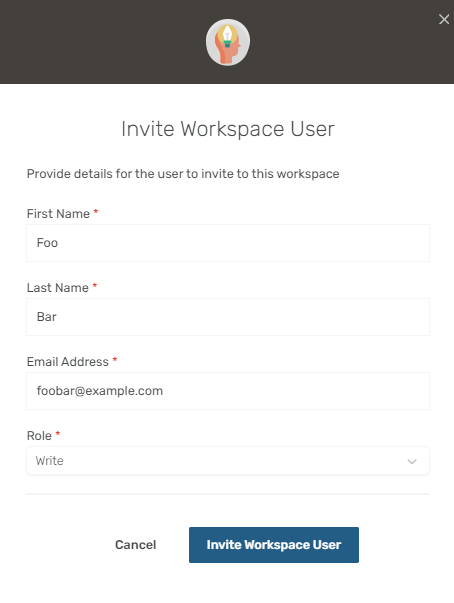
Manage Users
Here you can manage and invite existing workspace users.
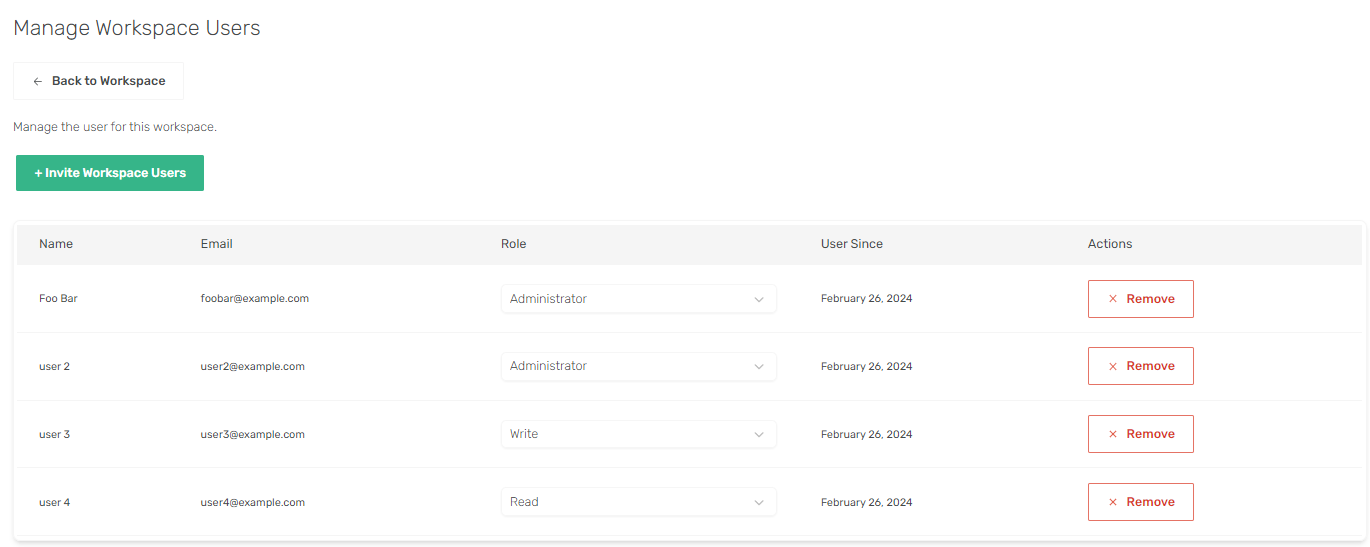
Adding a user
Currently we only support adding users to a workspace via invites.
You can do this by navigating to your desired workspace and clicking the Manage Users button.
A workspace user can be assigned one of these roles:
- 🛡️Administrator
- 📝Write
- 📖Read
- This role can:
- Read Data from Workspace
- Send Invites
- Write Data to Workspace
- Import Synapse
- Managing Users of the Workspace
- Modifying the Workspace Metadata
- Bulk Operations
- This role can:
- Read Data from Workspace
- Send Invites
- Write Data to Workspace
- Import Synapse
- This role can:
- Read Data from Workspace
- Send Invites
Manage Apps
Here you can manage the applications allowed to access this workspace and the granularity of access to the workspace:
- Read: app can only
readdata from workspace. - Write: app can
read/writedata from/to workspace. - Administrator: app has full access to workspace.

Authentication
Authentication method will depend on your app type:
- System - a system application that is authenticated via client credentials OAuth flow.
- User facing (Patient/Provider) - an application that is meant to be used by a user. In the case of a regular workspace MeldRx authentication is used, when the workspace is linked, authentication is delegated to the external (linked) FHIR server.
Before authentication can be made you need to register your App as a MeldRx client. If your workspace is linked you will need to create a Linked App which is also described in the App section.
The main values that you need to note before going forward:
- MeldRx App Id - this will be used as the
client_idauthentication parameter. - MeldRx App Secret - (Optional) if you created a confidential client, you need to take note of the generated secret.
- Workspace Id - this will be used to forge the
audorissauthentication parameter.
Once you have an access token, it's added the http requests as a bearer token in authorization header, like so: Authorization: Bearer <JwtToken>
System App Authentication
For system apps the token URL endpoint is scoped to:
- Standalone workspaces:
https://app.meldrx.com/connect/token - Linked workspaces:
https://app.meldrx.com/<WorkspaceId>/connect/token
Client Credentials
Implemented as per OAuth Client Credentials RFC6749#section-4.4
The basic authentication header, as per specification, is generated by: base64(client_id + ':' + client_secret), both id and secret can be found on your MeldRx App page.
Example Curl:
curl -d "grant_type=client_credentials&scope=<Scope>" \
    -H "Authorization: Basic <BasicAuthenticationHeader>"
    -X POST https://app.meldrx.com/<WorkspaceId>/connect/token
JWKS Secret Type
Implemented as per SMART Backend Service
When generating the authentication JWT accorting to the above specification, fill the following values:
client_id- your MeldRx App Idaud- token URL endpointhttps://app.meldrx.com/<WorkspaceId>/connect/token
Example Curl:
curl -d '{"grant_type":"client_credentials","client_assertion_type":"urn:ietf:params:oauth:client-assertion-type:jwt-bearer","client_assertion": "<GENERATED JWT>"}' \
    -H "Content-Type: application/json" \
    -X POST https://app.meldrx.com/<WorkspaceId>/connect/token
User Facing App Authentication
Examples of user facing app authentication can be found in App Templates
When redirecting the use for authentication, set the following parameters:
client_id- your MeldRx App Idiss- your workspace URL,https://app.meldrx.com/api/fhir/<WorkspaceId>redirectUri- should be the one of the Redirect Uris specified on your MeldRx Appscope- same scopes as defined on your MeldRx App
Access Workspace
Before you can access a workspace you will need to obtain an access token. For more information about the access token, reference the Authentication section.
Hint: For a quick test, you can access the unauthenticated metadata endpoint for that workspace on: https://app.meldrx.com/api/fhir/<WorkspaceId>/metadata
Once authenticated, here are some simple read operations that can be performed:
Read Patient
curl -H "Authorization: Bearer <JwtToken>" \
    https://app.meldrx.com/api/fhir/<WorkspaceId>/Patient/<PatientId>
Search Patients
curl -H "Authorization: Bearer <JwtToken>" \
    https://app.meldrx.com/api/fhir/<WorkspaceId>/Patient
Linked Workspace Access
Linked workspaces can be configured to get data from either the MeldRx environment or the external (linked) FHIR environment.
By default requests are routed to:
- read - MeldRx environment
- search - external FHIR environment
- create - MeldRx environment
- update - MeldRx environment
- delete - MeldRx environment
- $operations - are performed as searches, so they will be routed externally
Configure request routing
Before we begin, note that a request for Observations https://app.meldrx.com/api/fhir/<WorkspaceId>/Observation would search all observations on the external FHIR environmnet. (ignore the category requirement for breviety)
- Go to your workspaces (
Command Center > Workspaces) - Open the desired workspace by pressing the
Managebutton. - Select the
Manage Data Rulestab - Collapse the
Bulk Updatestab Trigger Actionset toReadResource Typesearch forObservationAction Targetset toMeldRxorBoth- Click
Update Rules
After this configuration is updated, the request for Observations https://app.meldrx.com/api/fhir/<WorkspaceId>/Observation would search all observations in the Data Vault if the Action Target is set to MeldRx. If Both was selected it would search both the MeldRx Data Vault and the external FHIR environment and return 2 bundles.
Using this Data Rule we can extend existing observations about a patient in the external FHIR environment, and start adding the ones in the MeldRx environment.