Apps
A MeldRx App is a powerful platform designed to connect SMART on FHIR applications, making the integration with various EHR and other systems effortless and secure. By provding a streamlined process for entering linked app details and setting up authentication methods, it ensures a seamless setup experience. This section contains a break down of the individual fields in the app and linked app creation screens.
Creating an App
- From the home page login to the Command Center
- Navigate to your
Appspage. - Press
Create App
Step 1 Provide App Details
- 🔥Standalone
- 🔗Linked
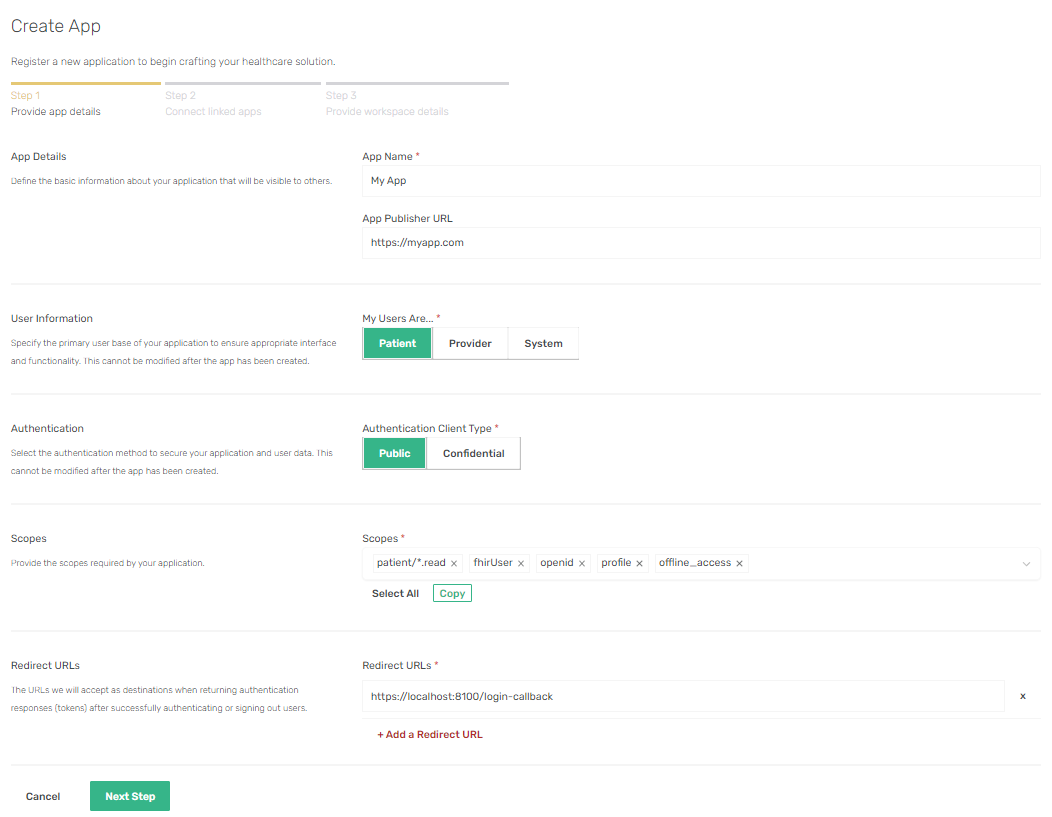
App Name
This is the human readable client name and will be displayed to all of your users in the consent screen when they log in.
App Publisher URL
This is a URL for your application. Generally, we recommend this to be the URL to the homepage of a site that describes your application and its capabilities.
App User Type
The app user type will pecify the primary user base of your application to ensure appropriate interface and functionality. This cannot be modified after the app has been created.
Patient is to be used by people who are patients of the EHR that your app is linked to.
Provider is for an application to be used by clinics/practitioners.
System is for a purely backend application using client credentials to preform background tasks.
Authentication Client Type
A client type is based on their ability to authenticate securely with the authorization server. This cannot be modified after the app has been created.
Public are clients incapable of maintaining the confidentiality of their credentials (e.g., clients executing on the device used by the resource owner, such as an installed native application or a web browser-based application), and incapable of secure client authentication via any other means.
Confidential are clients capable of maintaining the confidentiality of their credentials (e.g., client implemented on a secure server with restricted access to the client credentials), or capable of secure client authentication using other means.
Scopes
Scopes define granularity of access an application has to one's data.
Redirect URLs
Add one or more redirect URLs for the application here. This is where the server will redirect to with authentication/authorization details. This will also serve as a post logout URL, meaning that if the user is successfully logged out our identity provider will redirect the user to that URL. You can add a maximum of 5 Redirect URLs.
Step 2 Connect Linked Apps
- 🔥Standalone
- 🔗Linked
For a Standalone Application you dont need any Linked Apps so you can skip this step by pressing the Next Step button.
Creating a Linked App
Before creating a linked app, you will need to create a regular app with that EHR first. You can add multiple Linked Apps to one MeldRx App. For select EHRs we allow you to use meldrx creadentials, so you can start testing on their sandbox environment without registering directly with the EHR.
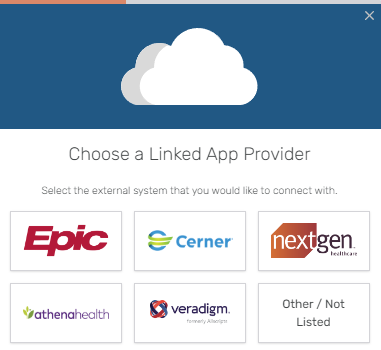
Linked App Provider
Firstly choose an EHR provider you would like to connect your app with. Currently for quick select we have the major EHRs: Epic, Cerner, Nextgen, AthenaHealth and Veradigm. The latest FHIR API Provider for that EHR will be selected.
Select Other if you want to link with different EHR.
If you have selected Other as your EHR you will have to select a FHIR API Provider from the dropdown of available ones. The displayed options are FHIR API Providers that are listed on the Certified Health IT Product List (CHPL) that have been certified by the ONC Health IT Certification program.
If you don't see your desired EHR on that list get in touch with us.
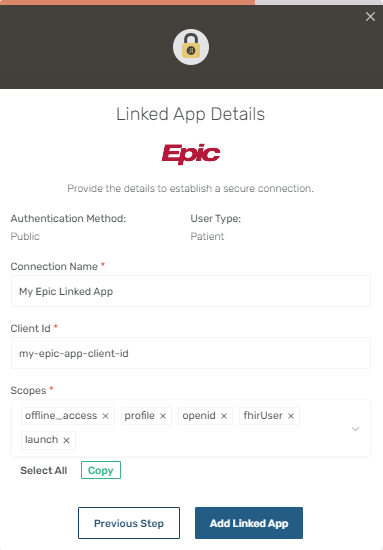
Authentication Method
The method of authentication for your linked application is inherited from your app.
Public - your client cannot securely store a secret, and the token exchange will be handled by the client in the user agent.
Confidential - your client can securely store a secret on a hosted server, and the token exchange will be handled by the client backend via a backchannel.
User Type
Same as in the App, the app user type will specify the target for your application. If your app is a patient facing application then the linked app will be of the patient type as well.
Connection Name
This is the display name of your linked application.
Client Id
This is the Client Id of the application that you are linking with (e.g. an Epic Provider App on their website)
Credential Type
For System Apps you need to provide Client Credentials as well.
Json Web Key Set (JWKS) - is a set of keys containing the public keys used to verify any JSON Web Token issued by the Authorization Server and signed using the RS256 signing algorithm.
- Signing/Encryption Algorithm (alg) - is the specific cryptographic algorithm used with the key. (eg. RS384)
- Key Id (kid) - is the unique identifier for the key.
- Private Key - a secret, randomly generated string of alphanumeric characters that's used to secure data and assert your verifiable identity.
Certificate - utilises a private key for asymmetric encryption.
- Private Key - a secret, randomly generated string of alphanumeric characters that's used to secure data and assert your verifiable identity.
Hosted JWKS - Will generate a certificate on your behalf and host a JWKS URL. You can then provide the URL to your EHR during app registration.
Scopes
Scopes define granularity of access an application has to one's data.
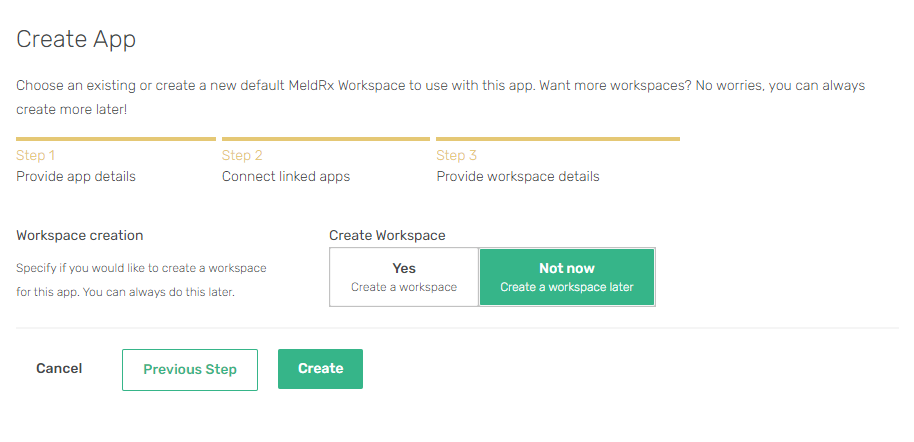
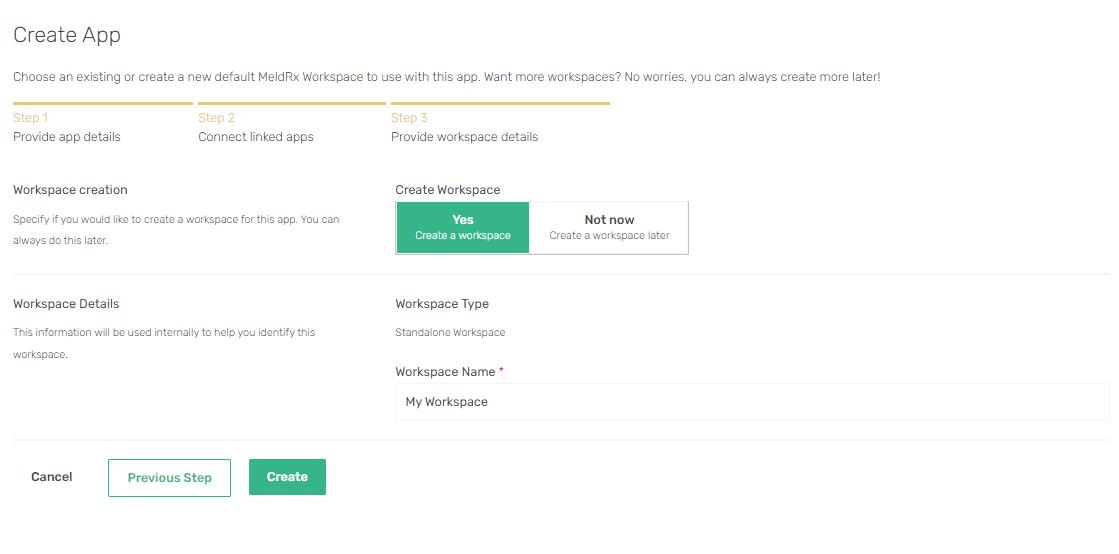
Step 3 Provide Workspace Details
You can finalise your app creation without provisioning a workspace or create a new default MeldRx workspace to use with this app.
- 🔥Standalone
- 🔗Linked
For a Standalone Application you will be creating a Standalone Workspace. For this you will only need a Workspace Name which is the display name of your workspace.
Visit the workspaces page to learn more about using your MeldRx workspace.
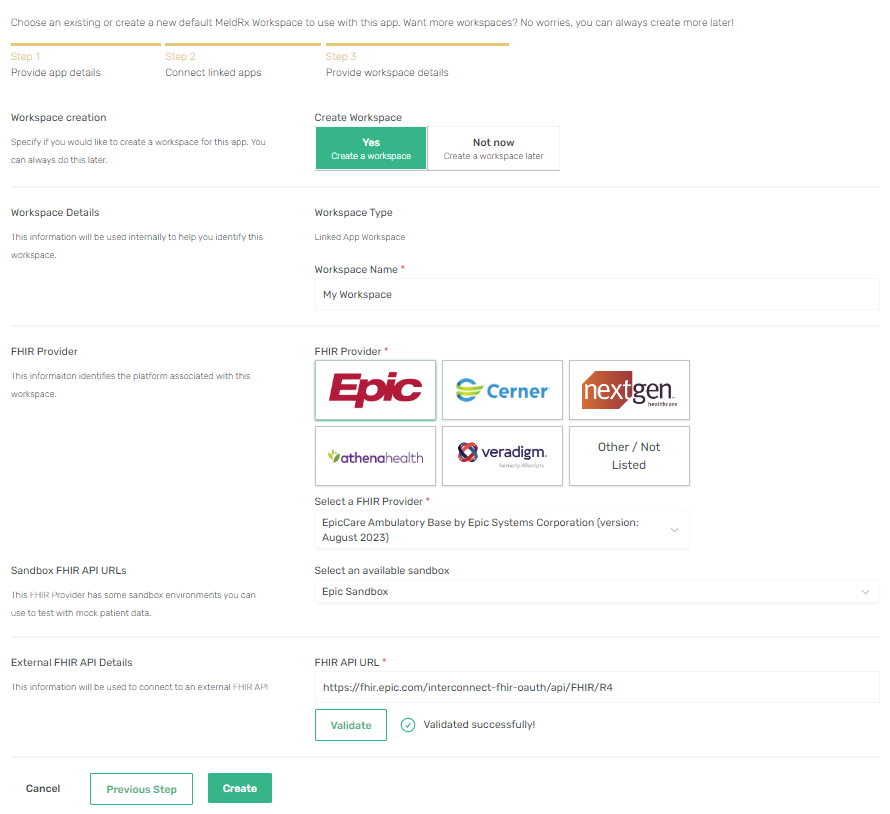
For a Linked Application you will be creating a Linked Workspace.
Workspace Name
This is the display name of your linked workspace.
FHIR Provider
If you have a linked app connected, the first one will be selected to be linked with your workspace. You can switch it for a different one by selecting its FHIR API Provider. If you have multiple linked apps connected to a single app, you will need to create individual workspaces for them seperately on the workspaces page.
External FHIR API Details
You will need to provide a FHIR API URL for the sandbox server of that EHR and validate it before you can finalise your app creation.
You can find the FHIR API URLS for the major EHRs on our EHR reference page.
Successful App Creation
Upon a successful app creation you should see a screen like this with some more details and steps for starting your app development. You can find a quick guide for create-meldrx-app here.
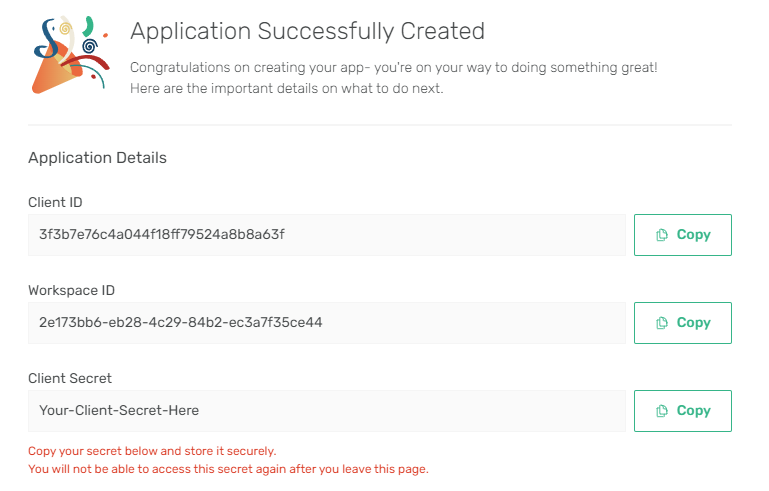
Client Id
This is your MeldRx App Id. The Client Id is assigned upon app creation and will be used as the client_id authentication parameter.
Client Secret
This is your MeldRx App Client Secret. It is generated once your app is saved and will only be displayed once so make sure to save it in a secure container.
Workspace Id
Your workspace Id will be used to forge the audience or issuer authentication parameter. The workspace Id is assigned upon workspace creation.
Workspace URL
This is your workspace FHIR Server URL it will be used to make API calls.
Managing Your Application
You can manage your applications on the Apps page. Here you can:
- Change the Name
- Change the Publisher URL
- Add/remove scopes
- Add/remove Redirect URLs
- Add/Edit/Remove Linked Apps
You can delete your application at any time. Simply navigate to the app manage page of the app you wish to delete and click on the delete button. A confirmation window will be displayed. Once confirmed, the application and associated linked apps will be deleted and can no longer be used to make authenticated requests to any of our APIs.