Walkthrough: Patient-Facing App
Introduction
This section will help you build a patient facing linked application with MeldRx. This example will be linked with Epic, however you can choose a different EHR.
Prerequisites
Before getting started, please make sure you have the following:
- An account with Epic FHIR developer portal
- A MeldRx Developer account (sign up at MeldRx)
- Dowload or update the create-meldrx-app CLI
MeldRx App Setup
Log in to MeldRx and navigate to the apps page (MeldRx > Apps) and press Register App.
Step 1
Provide app details
- Give your app a Name.
- Select
Patienton theApp User Type. - Set the
Client TypetoPublic - For the
Scopesselect the following:
patient/*.read openid profile launch launch/patient
- Set the
Redirect Urlsas :http://localhost:3000/login-callbackhttp://localhost:3000
- Go to the Next step.
Step 2
Connect linked apps
- Select a
Add Linked App. - Choose
Epicas the Linked App Provider. - Choose to use your own credentials.
- Give your linked app a name.
- In the
Client Idpaste in theNon-Production Client IDfrom the your Epic app. - Match the
Scopeswith the scopes from your app above:
patient/*.read openid profile launch launch/patient
- Add the Linked App.
Step 3
Provide workspace details
- Select
Yesto workspace creation. - Give your Workspace a name.
- Select the same
FHIR API Provideras you did in the Linked app e.g.Epic, if not already selected. - Select the
Epic Sandboxurl from the dropdown. - Once the validation is complete press
Create.
You should see a screen like this upon creation:
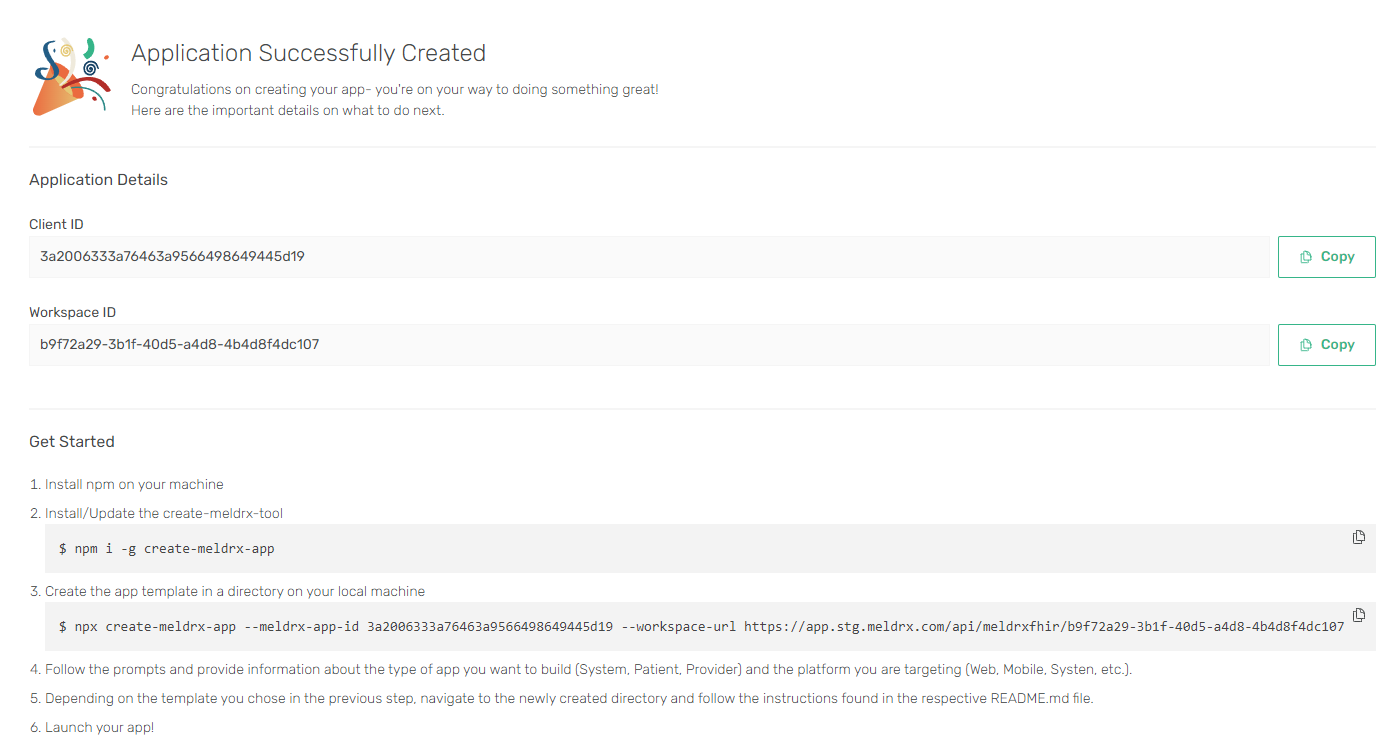 You can follow the steps on this page to create your MeldRx app.
Here you can find the commands you need to run to bootstrap your application using the create-meldrx-app CLI.
You can follow the steps on this page to create your MeldRx app.
Here you can find the commands you need to run to bootstrap your application using the create-meldrx-app CLI.
Creating the app
Now that you've set up an app and workspace that are linked with Epic, you can move on to coding the app. We will be using the Create-MeldRx-App CLI to get a quick template for a patient facing app.
Installation
npm i -g create-meldrx-app
Using the Tool
Navigate to the path where you want to create your application and run:
npx create-meldrx-app --meldrx-app-id [clientId] --workspace-url [workspaceUrl]
- Supply the directory where you want to create your app.
- Select the
Patientoption. - Select the
Weboption. - Select
Blank Web App (NextJS).
Now change your directory to your newly created app folder and run:
npm install
You can now run the application by using:
npm run dev
Testing your app
- Once your app is running, in your browser go to
http://localhost:3000/. - You should see a template screen, here press the
Launch with MeldRxbutton. - On the Epic MyChart screen login as a patient. You can find a list of test patients here.
- Navigate through the MyChart and MeldRx consent screens by pressing
Allow Access. - You should see on a page with a
Patient ResourceJSON of the patient that you loged in as.